Hi everyone & welcome back!
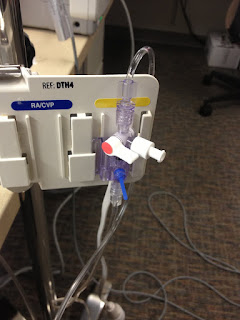
As my experiments with burst pressure continues, I have relocated to a new office near Cardon’s surgery wing, where the equipment is kept. A special shout-out to Ms. Berlin, who kindly agreed to let me run these experiments in her office, despite the smell/messiness! Having brought in the tissue samples and been shown how to do a purse string suture to attach the needle/catheter to the sample, an anesthesia tech kindly helped us set-up the arterial line and showed us how to calibrate the monitor. Here is what the set-up looks like:

The apparatus I used to test burst pressure is called an arterial line. To reiterate from previous blog posts, an A-line is usually used to monitor patients in intensive care, and measures intra-arterial blood pressure.

This must be calibrated before the beginning of each test, or ‘zero’ed so that the pressure is at zero. Then, to pump fluid through the catheter and into the tissue sample, the blue tag is pulled. Once the tissue inflates, the observer would watch for signs of leaking and then record the pressure immediately after fluid can be seen.
The IV/Flushing system is controlled, in short, by a 3-way stopcock.

In terms of preparing the tissue sample, I started out with segments about 8 cm in length, sutured close on both ends. We tried running tests on these (see tissue sample with green butterfly wings), but due to the limited amount of solution/time, decided against using such large samples. Afterwards, I cut the approximately 8 cm long segments in halves and sutured up the open ends. These smaller segments are what I will be running tests on in the future!

Above is a 4 cm long segment, with a butterfly catheter attached via purse string suture. The reason for the “butterfly wings” or side flaps around the needle are to anchor it to the tissue, in case pressure causes it to pop out.
The A-line offers a wealth of information, but for this experiment, I will only be looking at the pressure (pictured above in red).
A problem that I encountered this week came from the difficulty of determining exactly when the tissue sample started leaking. Once it begins to leak, the pressure stops increasing but fluctuates quickly. It was pretty difficult to get a precise measurement. In future testing, Dr. Truong suggested that I use food coloring so that the liquid that spills out will be easier to visualize. This, however, involves flooding the entire bag of saline solution (and even injecting the food coloring into the saline bag), which may be difficult to carry out and cause the saline bag to be unusable after my experiments.

These few hours that I spent working on testing burst pressure are some of the most interesting I have experienced in the project thus far!! It has been really exciting to be able to get the chance to use this equipment and even run tests with it.
Hope everyone has a great week!
Vanessa


